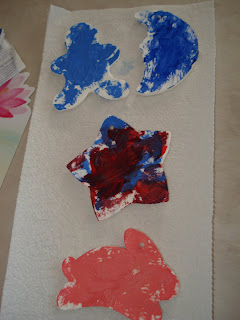
Here's a really easy ornament idea for kids with allergies. I don't know about you, but I just have such a hard time trusting store bought clays and doughs. Mostly because my daughter is so young and it ends up in her mouth no matter how many times we discuss that it's not for eating. And with the allergies, you never know what might end up in the clay or dough. I'm sure there aren't any regulations to list allergens on those kind of products.
Here's the recipe for homemade clay. It make a lot. You can easily half it or store what you don't use in a zip-lock bag. I'm not sure how long it will keep, but I would imagine at least a month.
Before we started, we looked at our Christmas tree and decided what was missing -- a moon, a gingerbread boy, twinkle star and a bunny. We also made a handprint ornament for Daddy that we are keeping white -- it's didn't photograph very well, but turned out pretty nice.
Play Clay
1 cup cornstarch
2 cups baking soda (1lb box)
1 1/4 cup water
1. Mix cornstarch and baking soda together in saucepan.
2. Add water to cornstarch and baking soda.
3. Bring to boil on medium heat.
4. Stir constantly until mixture is consitency of mashed potaoes.
5. Remove from heat immediately and put on a plate.
6. Cover with damp cloth.
7. When dough cools, roll it out to 1/4 inch on wax paper.
8. Use a cookie cutter to make shape.
9. Poke hole in top for string to add to hang from tree. I used the other end of a small paint brush. A pin or toothpick would work, too.
10. Allow 36 hours to dry depending on thickness. To speed up, turn oven up to 350 degrees. Place ornaments on wire rack or in cardboard box on rack. Leave in oven until oven is cool.
11. Leave white or paint with paint.
Yes, my 2-year-old painted these all by herself (I'm so proud). I stood back and watched. She was delicate with the ornaments and painted them really nicely. I was surprised on how deliberate she was with her strokes and choice of colors. I tried to get her to choose a couple other colors. But she only wanted red, pink, blue and another blue (I mixed white with blue). I'm guessing she had a vision.
**You can also add food coloring to water before mixing it with cornstarch and baking soda**
If you are familar with clay projects, there are a lot of different items you can make. In the past I used this clay to make a pinch-pot, which is fun to do with kids. Since there is no baking it's really nice, especially if your resources are limited.
Be sure to check out my other toddler-friendly ornament idea here!
A little update
12 years ago


I love this idea for my grand-daughters. I have them all next week and this is a GREAT!!! and EASY!!! craft for them to doI found your blog via Reflections from a Mother's Soul. I havve become a follower, I love to share recipes and ideas. Come by and visit my blog maybe you can do the same.
ReplyDeleteGeri
these are really cute! I have been looking for an ornament to make with my daughter, thanks for sharing!
ReplyDeleteThat is my kids favorite project. THey love painting ornament. Thanks for sharing.
ReplyDeleteHow cute!! And the ornament is pretty great too ;-)
ReplyDelete